Blackberry season is here, and as with the Stanley Cup play offs you have to sacrifice your body to get the best fruit. I’ve been out battling the brambles and have come home with a bounty of blackberries – 6lbs to be exact! Foraging and Canning are essential homesteading skills as per the Homesteading Skills Survey!

I’ve already made compote to have with yogurt, and frozen a bunch of blackberries for crumbles etc. You can find my Blackberry Lemon Scones recipe here. Frozen berries are perfect for it.
Today I made Blackberry Jelly which I haven’t done before, but having had it gifted to me as a wedding favour, its something I want in the pantry for the rest of the year! Toast and peanut butter Jelly sandwiches cry out for blackberries! Also, blackberries contain natural pectin, so its an easy, two ingredient recipe.
The Recipe
- 6lbs Blackberries (Makes approximately 8 cups of Juice)
- 6 cups Sugar
This recipe makes 8 16oz jars of Jelly
Method
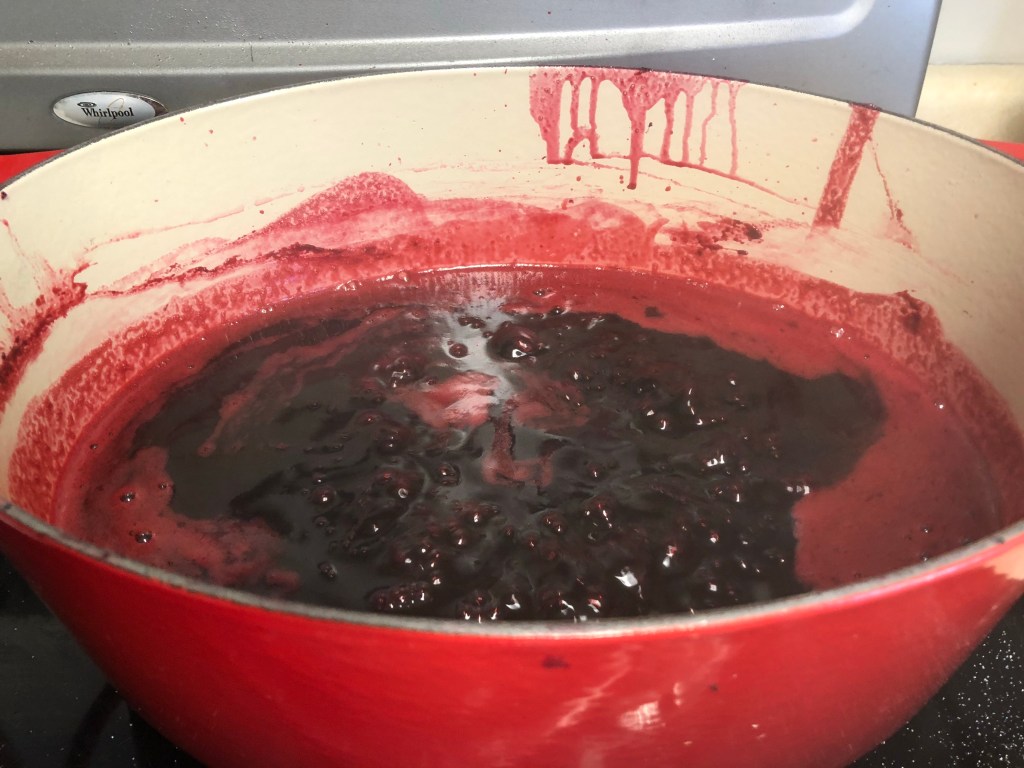
Take your blackberries and put them in a large pan. Add some water (about a cup is enough, so they dont burn. Heat them up and get the simmering. Once simmering, mash them gently with a potato masher, so all the fruit is broken up. You only need to simmer for about 10 minutes.

Take your simmered fruit and strain it. You can use a cheese cloth but a sieve works just as well, I ditched the cheese cloth because it was taking too long. Shaking the sieve gently from side to side got the job done, and I saved the pulp for a blackberry beer making recipe I’m going to attempt.
Strain the juice into a large container and put back in a big pan.

Add the Sugar and turn on a medium high heat, stirring occasionally to make sure the sugar and fruit are not sticking to the bottom. Burnt jelly tastes awful, nobody wants that.
Tip: The Pan should be no more than half full as the mixture will bubble and foam up.
The mixture doesn’t need to cook that long, remember sugar boils faster than water and can boil over easily, so don’t over heat it and keep your oven mitts handy. It needs to cook for 10-15minutes. At this point do a test. Take a dribble of the mixture and put on a plate in the fridge for a few minutes. If it forms a skin when you push it with your finger and has thickened it is nearly ready.
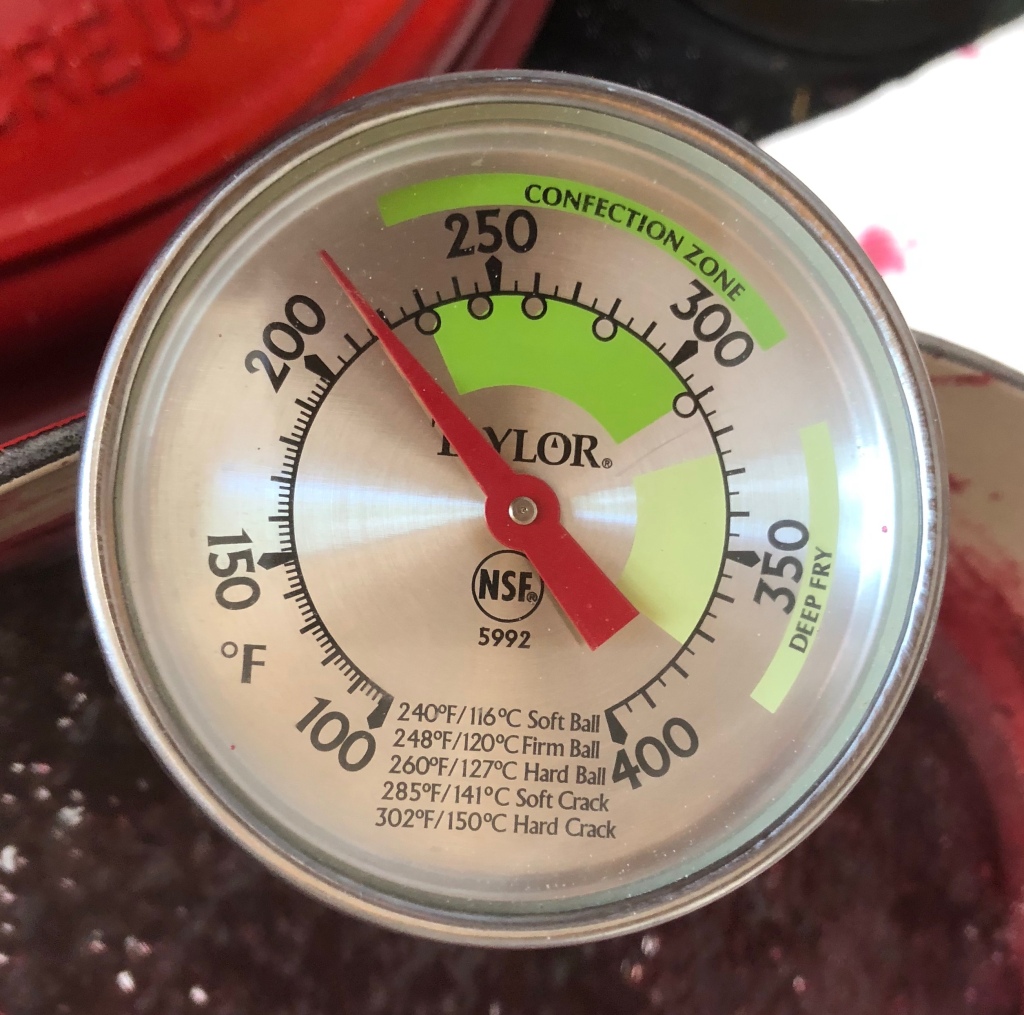
The best way to know it’s ready to can, is with a thermometer. Heat to 220 degrees Fahrenheit and that’s the jelly temp!
While all this has been happening you’ll want to have sterilized your jars. I did mine outside because it was a baking hot day, and I couldn’t stand the heat, so I got out of the kitchen! Boil them for ten minutes, lids as well.
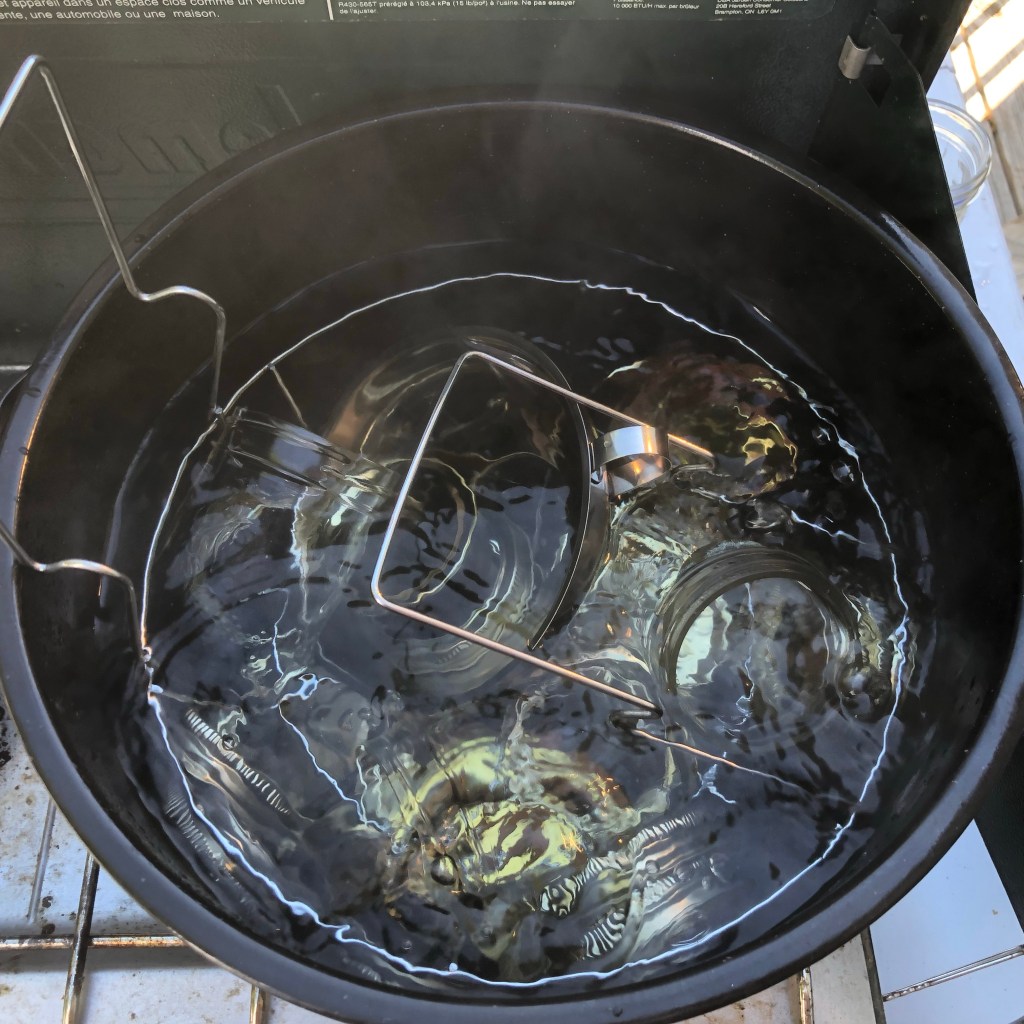
Remove the jars from the water and let them dry, sterilize the jar funnel as well if you’re using one. It’s way easier than trying not to dribble jelly down the side of the jars. Then boil the jars of jelly for 10 minutes, remove from the water and let cool. The lids should all seal down so they dont click when you press on them.

Did you try this recipe? Let me know! It goes great on my Black berry and lemon scones recipe! Remember, Grow, Eat, Repeat! Happy Homesteading!
