
I learned a lot about garlic this year. I had to plant in the greenhouse because I was dealing with a rodent issue in the autumn and planing outside wasn’t an option. We also get A LOT of rain on the west coast, so rotting was a concern.

What did I plant? Garlic from a local farm which was a small white garlic, Russian Red, German Red, Giant Garlic, and one that was simply identified as “Regular.” How did they do? Pretty good overall! Even scored a few freebies along the way.
Giant Garlic, or Elephant Garlic is closely related to leeks and has a mild flavour which is great for stews, salads and over steak or chicken when you don’t want to overwhelm the flavour. It also comes with a bonus that other garlics haven’t provided yet. Corms!

Corms look like little chickpeas, or very small garlic cloves and grow on the outside of the garlic bulb. They are basically bonus garlic bulbs if you have a little patience. You can plant them and in their first year they will grow into a single clove, wait a second year and you’ll have a fully formed bulb! Free garlic!
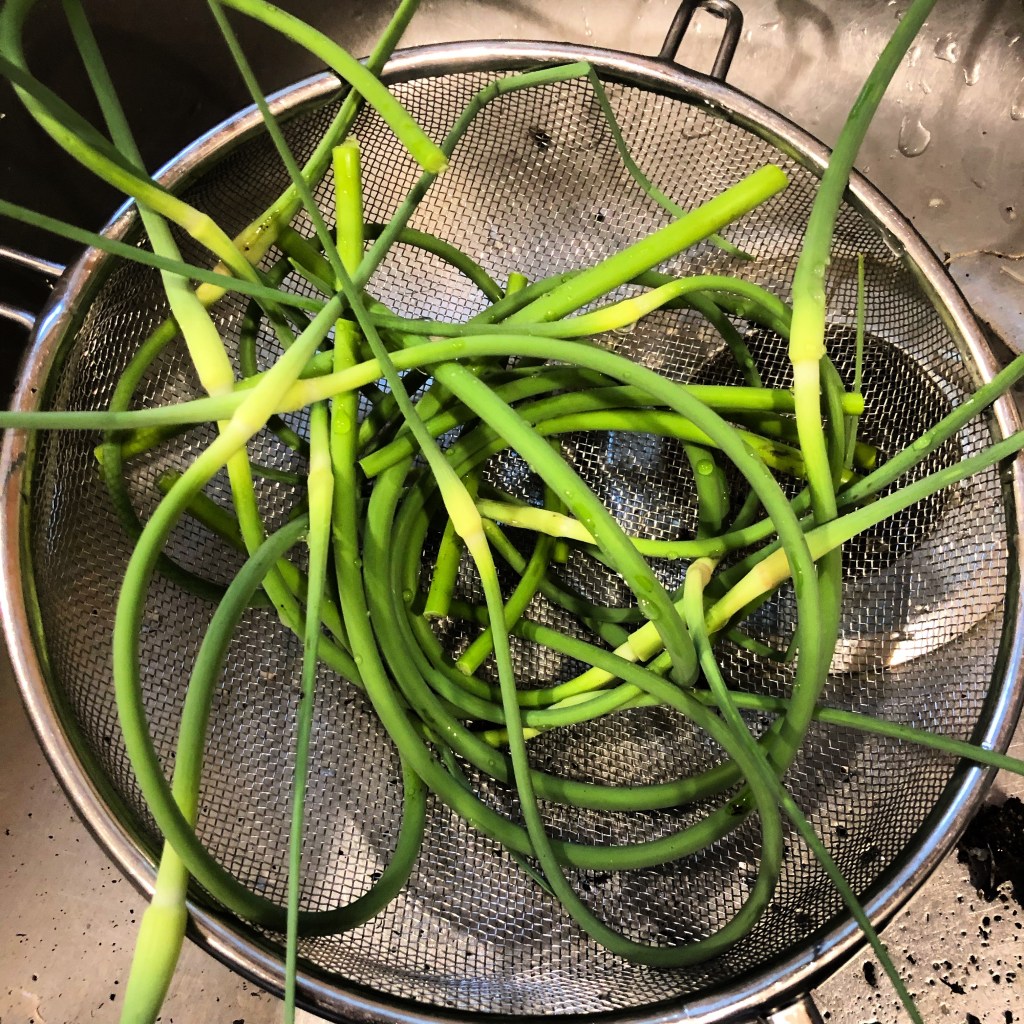
The elephant garlic and the red German also produced Garlic Scapes which are the flowers that come up in the middle of the stalk in a curl, like a fern might put out. Hard neck Garlics give you scapes, soft necks do not. Generally you can harvest about 4-6 weeks after the scapes appear.
Snap the scapes off to make sure the plant puts it’s energy into the bulb, and hey presto! More free garlicky flavour! You can pickle scapes, chop them up for an omelette or make pesto. I chose to frazzle mine up with some chicken and have them with pasta. They pack a ton of flavour which is more subtle than the bulb, but will still keep the vampires away!
Garlic doesn’t lie down like onions when ready to harvest so checking is good. You know its ready when about half the leaves on the stalk (each represents a clove below ground), have turned pale and started to look like they’re dying off. I dug around a couple of random bulbs to see if they were ready to pull before committing to pulling the whole lot up and recommend doing this because in some cases the cloves had not yet formed. If the garlic looks like a single bulb (think flower bulbs), it’s not ready, and you should wait a bit.
Of the garlic grown this past season, the “regular” did the best in terms of size. A few were lost to rot, but compared to previous years, the harvest was bountiful. So now what?
Time to cure it. Curing garlic is easy, and again very satisfying. All you need is a cool dark place to hang it upside down. As it drys, the outer layers become papery. No need to worry about the dirt, most of this will fall off or brunch away easily once it’s dry. Definitely DO NOT WASH your garlic. Adding moisture makes it go mouldy…trust me, I tried it on a bulb to see what would happen.
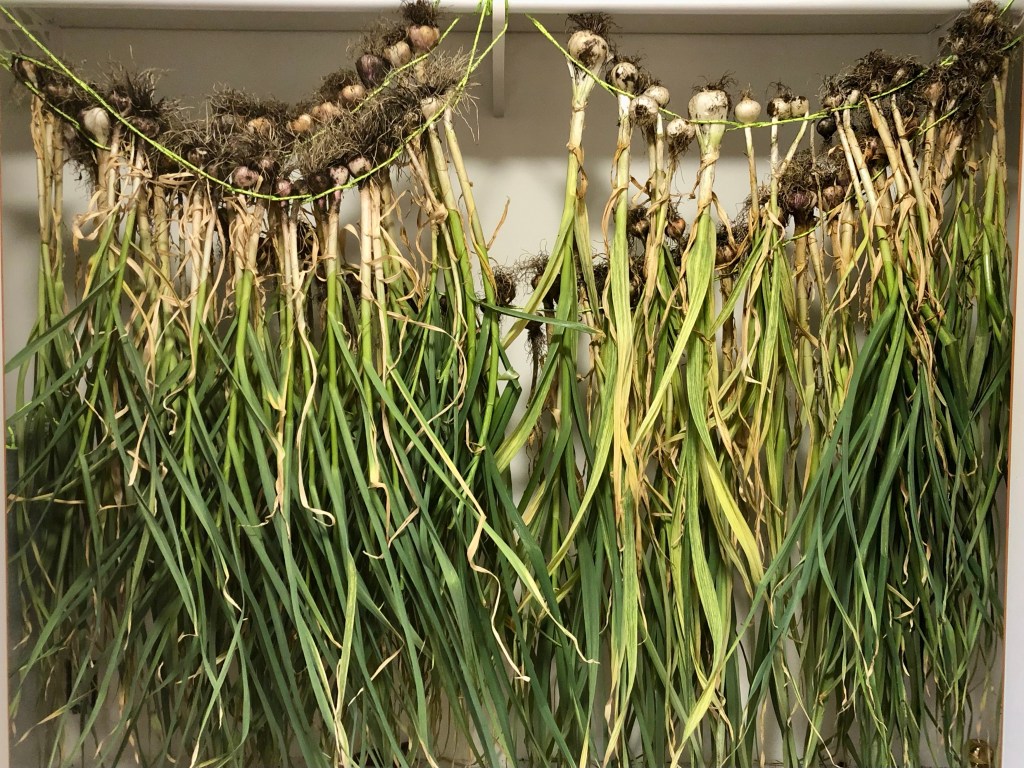
If like me, you have bulbs that are a bit soggy on the outer leaves, don’t cure them, those cloves are still good but have to be used sooner rather than later. The rest of it is hanging up to cure and hopefully will provide full flavour behaviour for the rest of the year. The cure is complete when the green is all dried out and has turned brown. Then you can trim the roots and stems, leaving about one inch of stem at the top of each bulb. To remove any dry dirt, I use a tooth brush, but something similar that won’t damage the skins and is dry would work too. Store them in a cool, dry, dark place (not the fridge), then you can begin enjoying, or share the harvest with friends and family!
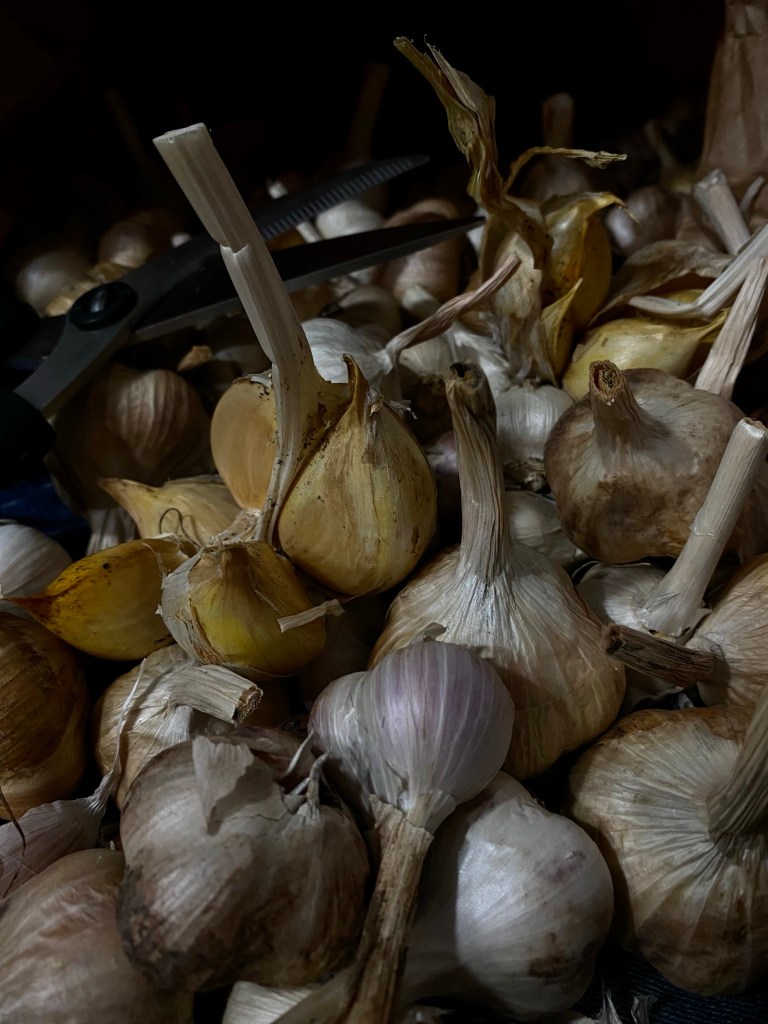
The final weigh in of dry cured garlic was 4lbs 14oz (2.2kg)! After getting only 5 viable bulbs last year, I’m stoked with this result!
If you have a favourite garlic that you like to grow, please let me know in the comments, also happy to take garlic recipes!
As always, Grow – Eat – Repeat!
