
The easiest way to get going with a sourdough starter is when someone gifts some to you, but if you have to start your own, here is how! It takes 7-10 days to get one going, but if you take care of it, you will have a reliable starter for breads, pancakes, sweets and more! You may even choose to name your starter! Mine is called Marletta!
The Basics
How does it work? Basically you’re mixing flour and water and leaving it in a jar in a warm place where the natural yeasts can begin to ferment. Each time you “feed” the starter (add more flour and water) you have to discard part of it, which you can choose to fry in a little butter as a kind of drop scone pancake, add to your compost heap, or use in a discard recipe like my Cheese Scones!
You will need wheat or rye flour, AND all purpose flour or bread flour, a big mason jar and water (ideally filtered to remove any chlorine, but it doesn’t really matter if you have to use it straight from the tap, I do, all the time).
Day 1
Take a cup of flour (wheat or rye have given me the best success), and add 1/2 to 3/4 cup of filtered water. Mix with a fork to get all the lumps out. It will be a thick paste. Leave it covered at room temperature (22-24 degrees Celsius), for between 24-48 hours. It will depend how warm your house is, when you see bubbles forming you’re ready to move to day 2.
TIP: warm places like near the water boiler or on top of the fridge are good places to get the starter going. In the same room as a a wood stove, but not too close is also good. Make sure it’s out of reach of pets, cats can knock it over, dogs will love to eat it!
Day 2
Only begin day 2 if you see bubbles in the starter.
Discard all but 1/2 cup of the starter in the jar, then add a cup of all purpose or bread flour to the remaining starter in the jar with 1/2 to 3/4 cup of filtered water. Mix thoroughly to get all the lumps out, close the jar and place it back in it’s warm spot for another 24 hours. Again, if 24 hours isn’t enough leave it another day or until you see bubbles. be patient, it will be worth it!
Day 3
Again, you should have bubbles in your starter before beginning day 3.
Repeat the actions of Day 2. You should begin to see the starter getting bubbles more quickly by day three. If you don’t your starter is likely not warm enough, try another spot.
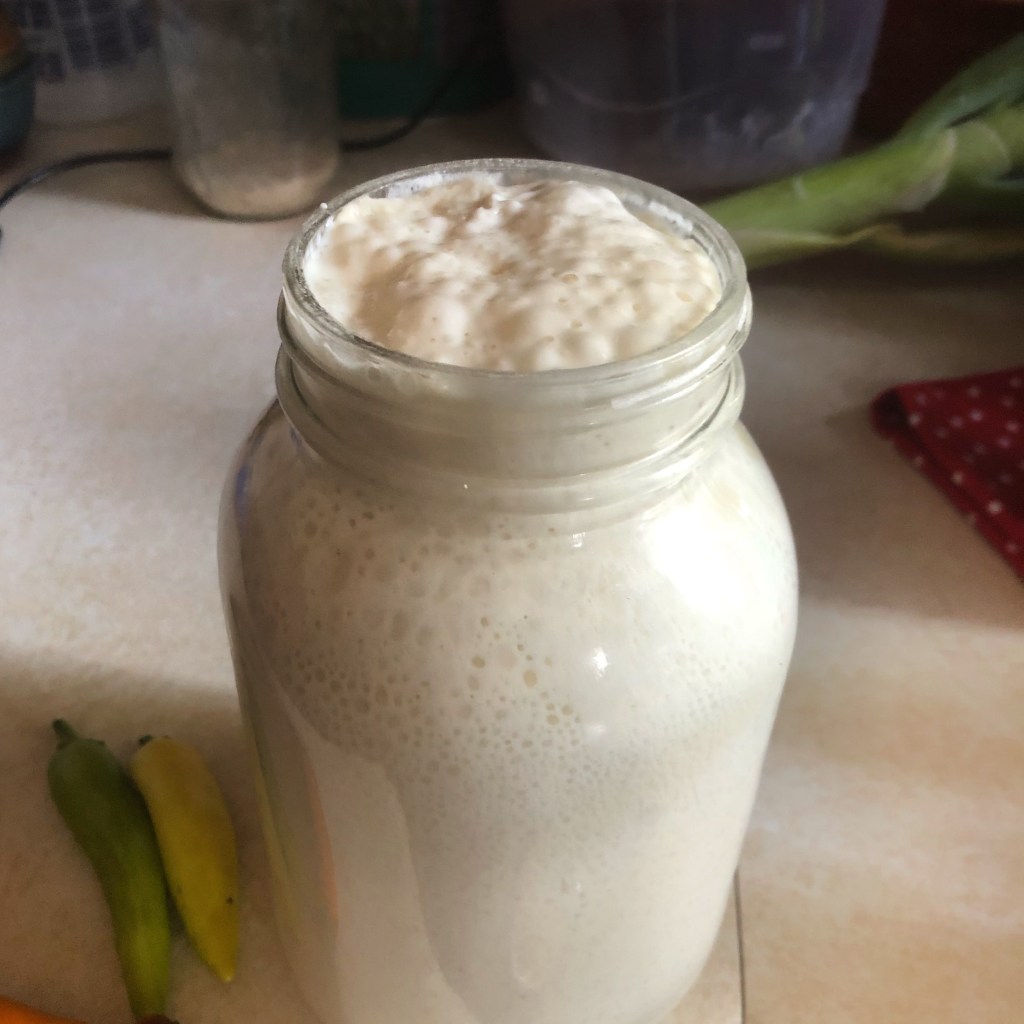
The starter will get bubbly and rise up in the jar. Let it sit again for 12-24 hours in it’s warm spot. When the starter starts to deflate in the jar, this means it is hungry! DON’T FEED IT BEFORE IT DEFLATES. If it’s still bubbling, it is still feeding!

You will notice as the starter gets going that it starts out as a thick paste when you feed it, and then becomes thinner and more liquid like in appearance. When it is more liquified and deflated, it is hungry!
TIP: Not sure if your starter is rising? Try marking the outside of the jar with a marker pen like a sharpie when you feed it, and then see how far past it it goes as it moves up the jar!
Day 4
Time to get a clean jar.
Discard all but 1/2 a cup of starter and put it in a clean jar.
Today you are going to feed your baby twice. The same drill. 1 cup of flour and 1/2 to 3/4 cup of filtered water. Feed it once in the morning and then again at bedtime. IF THE STARTER HAS NOT DEFLATED skip the second feeding and feed it first thing when you wake up the next day instead.
TIP: Be patient, your starter might be slower to get going because of temperature, the flour, or even the water. If you don’t have filtered water, leave a jug of water out on your counter overnight uncovered and use that. Usually all the additives have gone after about 12 hours (advice given to me by my sourdough hero).
Day 5
By this time your starter should be reliably bubbling when fed and deflating when hungry. You’re aiming for it to double in size.
Repeat the steps of Day 4, feeding twice today.
Day 6
Today your starter is strong and almost ready to begin baking with. Today is a proud day as you discard all but 1/3 cup of the starter. This is the test to see if your starter is strong enough.
Put it in a clean jar and add a cup of flour and 1/2 to 3/4 cup of filtered water. Mix it will, no lumps! You will have likely developed a strong mixing arm by day 6, you are a sourdough warrior!
If all is going well, your starter is ready to face it’s final test before beginning to bake a delicious loaf of sourdough bread!
Leave your starter in it’s warm spot and when it hits it’s peak bubbliness, take a teaspoon and scoop some of the very top of the starter out. Drop it into a glass of cold water. If it floats to the top it is ready to bake with! You did it! You kept it alive!
If your starter is not bubbling and passing the flat test
Don’t despair, depending on temperature, your flour and your water, it can sometimes take longer. The starter I got going with wheat flour took 11 days to pass the float test. Keep repeating the feeding steps or check out my troubleshooting post!
How did you get on? Did you name your starter?! Let me know in the comments, and remember: Grow – Eat – Repeat!
